Pyle-Pro PCT40 Pro Audio Cable Tester (12 Plug, 1/4-inch, XLR, RCA, TRS, Speakon, S Type, Banana Plug, DIN, RJ45)

You Save: $35.99 (50%) || Pyle-Pro PCT40 Pro Audio Cable Tester (12 Plug, 1/4-inch, XLR, RCA, TRS, Speakon, S Type, Banana Plug, DIN, RJ45)


Tuesday, April 26, 2011

The Virtues of hidden Electrical Cables


Digital Photography Secretsby David Peterson Click Here!
How to

Most contemporary communities today utilize hidden electrical cables to distribute electricity to homes instead of unsightly overhead cable and utility poles. hidden electrical cable is also ordinarily used for parking lot Lighting, and is a good option for property owners who need to Power outbuildings. hidden installations are not without their own problems however and, even though less frequent than overhead installations, hidden cable does degrade over time and break.

Underground cable is field to breaks, called faults, which are caused by any amount of things. Cable that has been installed in rocky terrain is especially susceptible to breakage. Other things that lead to cable damage are citizen digging into the cable while installing something else, ground shifts while freeze/thaw periods, or cable that were damaged while the installation. As mentioned earlier, all galvanic cable degrades over time and will eventually fabricate problems.
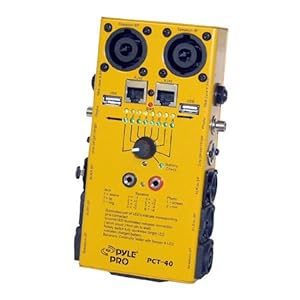
Cable Tester

So what do you do when your hidden electrical cable fails, or faults? Honestly, your best bet would be to call a pro who can locate the hidden cable and the break for you. The tool needed for this work can be expensive, so leaving the work to a pro is recommended. The fault locator will use a cable tester to settle that a break exists.

How to The Virtues of hidden Electrical Cables

Then he/she will use an hidden cable locator to trace the path of the hidden electrical cable, and will probably use paint to mark where the cable runs underground. At that point the cable fault locator will use one or more of several methods to certainly locate the exact spot where the electrical cable is broken. He/she may use a hill of inherent method, which tests the area for voltage changes in the ground, or he/she might use an earth gradient method, in which a high voltage surge is sent through the electrical cable and can be detected with a special meter. These methods, when used by an experienced hidden cable specialist, are very accurate and efficient. There are times however, when conditions within the electrical cable or the ground forestall these methods from working very well.

In ultimate cases the fault in the hidden electrical cable may need to be settled by either excavating several locations to test the cable, or another option would be to replace the section of hidden cable that is in question.

Underground electrical cable is favorable and aesthetically pleasing, but when problems occur it is best to enlist the services of an expert, or hidden cable specialist, to pinpoint the break and recommend you on the best methods of repair.

The Virtues of hidden Electrical Cables


Digital Photography Secretsby David Peterson Click Here!

Tags : USB Battery Charger & Accessories Deals How to Use Trimline Edger Video Worst Dressed Oscars 2011

Tuesday, April 19, 2011

manufacture Your Own Cat 5 Patch Cable - Some coarse Pitfalls and Mistakes


Digital Photography Secretsby David Peterson Click Here!
How to

It can be real handy to have one or two added Ethernet cables handy -- when you are rearranging components, or have to hook up a brand-new component. Pre-made cat 5 patch cables are sometimes high-priced to buy, however, so it can be cheaper to learn to make your own. But if you don't do it correctly, your patch cable will be useless.

One of the most base mistakes that many population make when trying to make their own cat 5 patch cables is that they try to use the wrong tools. For example, they may have a crimping cool designed for use with telephone principles modular connectors -- they try to use this tool to crimp the connectors for their cat 5 cable wiring -- but it just will work properly, because telephone connectors are a dissimilar size from those used on 5 wires.

Cable Tester

Another base mistake is in not purchasing enough cable. You can generally purchase cat 5 patch cable wiring in 1000-foot rolls -- if that will be too much for your wiring project, you can keep the rest of it in storage, in case your installed cable goes bad in the future. Or, you can pass along the extra cabling to a friend or house member so they can do their own home computer wiring.

How to manufacture Your Own Cat 5 Patch Cable - Some coarse Pitfalls and Mistakes

In increasing to these materials, you will also need a good-quality stripping tool -- don't try to use a pen knife or something like that to strip off the outer insulation from the cat 5 patch cable. When used properly, a stripping tool will strip away the covering covering, without cutting or nicking the smaller, inside wires -- and it's very important that you don't.

Another very important item to have on hand is a cable tester. This gadget will allow you to check the integrity of your cable connections, before you surely try to use it with your computer equipment. Many population struggle, trying to shape out what is wrong with their computer network connections, when the qoute can be traced to a bad patch cord.

If you look inside of your cat 5 cable, you will see four pairs of smaller wires -- two wires twisted together -- it is very important that you do not untwist these wires any more than is requisite in order to expose enough wiring to attach your connector. The fancy for this is that each pair of twisted wires has been designed to work together, to minimize interference with the other sets of wires inside the cable. If you untwist these wires more than necessary, this dampening result is lost, and it could work on the performance of your patch cable.

Another area where population get messed up is that they cope cat 5 cable improperly. A base mistake is to staple this cable to the lowest of a wall or on a baseboard. This can crimp or crush the wires inside your cable. Instead, use only manufacturer-recommended supplies to hold your cat 5 cable in place. As well, make sure that you do not lay your cable near any existing wiring -- it may interfere with the signal transmission through the cable.

A final mistake that many population make when constructing their own cat 5 patch cables is not testing the cable once the connectors have been attached. It is always a good convention to use your testing gadget to verify the ability and integrity of your connections before you began using your patch cord. If your testing gadget indicates there is a problem, cut off one end of the cable and attach a new connector -- then test it again. If there is still a qoute with your cat 5 patch cable, flip it over and cut off the other end and attach a new connector there as well. Now test it -- once you get a green Light from your testing equipment, then you can begin putting that patch cable to good use.

manufacture Your Own Cat 5 Patch Cable - Some coarse Pitfalls and Mistakes


Digital Photography Secretsby David Peterson Click Here!

Tags : USB Battery Charger & Accessories Deals Lizard Lick Towing

Tuesday, April 12, 2011

Assembly of a type 6 Shielded Solid Or Stranded Rj45 Plug


Digital Photography Secretsby David Peterson Click Here!
How to

Twisted pair cables such as Cat5, Cat5e, Cat6 and Cat6a cable are a low cost and easy premise alternative to traditional coax cables for transmitting Kvm and Av signals. Kvm (keyboard-video-mouse) extenders via Cat5 may be used to reMove computers from harsh or sensitive environments, or to restrict bodily access to the computer. Video extension products such as Vga, Dvi, S-Video or Hdtv extenders via Cat5 are used to enlarge video displays. Each extender consists of two units - the local and remote unit, which are interconnected using a Cat5/5e/6 cable.

This record focuses on the proper method for terminating a Cat6 shielded solid or stranded cable using suitable tools and materials that are facilely available. With the proper use of the tools and a limited practice you will be terminating Cat6 cables in no time.

Cable Tester

Prepare the cable

How to Assembly of a type 6 Shielded Solid Or Stranded Rj45 Plug

You will first need Cat6 shielded cable (solid or stranded for the purposes of this article) cut to the desired length. The cable can be terminated before or after installation, even if you have a long run to make. Using a cable tester from the cable can be certainly tested for continuity, crossed pairs and pinouts to make sure all connections have been made properly.

Next you will need to make sure you have the definite plugs to quit the cable with. Distinct plugs are intended to Distinct types of cable, whether you have solid or stranded connectors, flat or round cable, shielded or unshielded, and Cat5, 5e, 6, or 6a. Be sure to use a plug convenient for your cable.

For tools you need a Cat5 wire stripper, wire cutters, Rj45 crimp tool, and a Cat5 cable tester.

Terminate the cable

First, thought about strip the jacketing from the cable to expose 1" of the insulated wire conductors and shield. Don't cut too deeply or you will nick the shield and wire insulation underneath. If you just score the cable jacket and bend the wire in several directions to quit the break, the result will be a good problem-free cut.

Next, peel the foil shield insulation back onto the cable jacket and trim to within practically ¼" of the jacket edge. Wrap the drain wire such that it is located at the bottom (locking-tab side) of the cable. Do not reMove any insulation from the conductors.

Trim the + shaped divider (an insulator core within some manufacturer's Cat6 cables, so this may or may not be present) that separates each of the twisted pair all the way back to the cut edge of the jacket.

Next, untwist the wires all the way to the jacket edge (but not beyond) and arrange them agreeing to Tia/Eia 568A or 568B standards.

For Cat6 cable, the Rj45 plug includes a loading bar used to properly space the wires for insertion into the Rj45 plug. Flatten and insert the wires into the loading bar. The loading bar has openings in it, one for each conductor. The wires must be located in the proper order for whether the Tia/Eia 568A or 568B standard.

With the wires in the proper order, slide the loading bar (with the raised edge up) all the way onto the cable as far as possible. Then trim off the excess wires that enlarge from the loading bar.

Insert the ready cable into the Rj45 plug such that the loading bar is fully inserted and the cable jacket extends inside the plug. The jacket and shield should enlarge at least 1/4" into the plug for proper strain relief and shield connection. Make sure the drain wire is positioned at the bottom of the connector as this is where it will see the greatest feel with the shield of the Rj45 plug.

Using the Rj45 crimp tool, crimp the assembled termination to make it permanent. Firmly squeeze the handles to set the contacts and fetch the plug. Once crimped, the termination should be tight and very difficult to remove.

Test the cable

Use the Cat5 cable tester to check your work. The tester will indicate proper continuity (complete relationship end-to-end), make sure the pairs have been matched up properly, and that the pinout is agreeing to the prime wire standard. If an end is wired incorrectly, the tester will indicate which end is incorrect. Plainly cut off the end and try again.

Be sure to see more articles about Cat5 cable termination. Other types of cable require sLightly Distinct procedures, so not all of the details for the cable you want to quit will be covered in this article.

Assembly of a type 6 Shielded Solid Or Stranded Rj45 Plug


Digital Photography Secrets by David Peterson Click Here!

Recommend : USB Battery Charger & Accessories Deals Swinging Saloon Doors Arabic Song Dance St. Peters Basilica

Tuesday, April 5, 2011

making Your Own Cat 5 Patch Cable - Some tasteless Pitfalls and Mistakes


Digital Photography Secretsby David Peterson Click Here!
How to

It can be real handy to have one or two additional Ethernet cables handy -- when you are rearranging components, or have to hook up a brand-new component. Pre-made cat 5 patch cables are sometimes high-priced to buy, however, so it can be economy to learn to make your own. But if you don't do it correctly, your patch cable will be useless.

One of the most common mistakes that many habitancy make when trying to make their own cat 5 patch cables is that they try to use the wrong tools. For example, they may have a crimping cool designed for use with telephone theory modular connectors -- they try to use this tool to crimp the connectors for their cat 5 cable wiring -- but it just will work properly, because telephone connectors are a dissimilar size from those used on 5 wires.

Cable Tester

Another common mistake is in not purchasing sufficient cable. You can commonly buy cat 5 patch cable wiring in 1000-foot rolls -- if that will be too much for your wiring project, you can keep the rest of it in storage, in case your installed cable goes bad in the future. Or, you can pass along the extra cabling to a friend or house member so they can do their own home computer wiring.

How to making Your Own Cat 5 Patch Cable - Some tasteless Pitfalls and Mistakes

In increasing to these materials, you will also need a good-quality stripping tool -- don't try to use a pen knife or something like that to strip off the outer insulation from the cat 5 patch cable. When used properly, a stripping tool will strip away the face covering, without cutting or nicking the smaller, inside wires -- and it's very prominent that you don't.

Another very prominent item to have on hand is a cable tester. This device will allow you to check the integrity of your cable connections, before you no ifs ands or buts try to use it with your computer equipment. Many habitancy struggle, trying to form out what is wrong with their computer network connections, when the question can be traced to a bad patch cord.

If you look inside of your cat 5 cable, you will see four pairs of smaller wires -- two wires twisted together -- it is very prominent that you do not untwist these wires any more than is significant in order to expose sufficient wiring to attach your connector. The speculate for this is that each pair of twisted wires has been designed to work together, to minimize interference with the other sets of wires inside the cable. If you untwist these wires more than necessary, this dampening effect is lost, and it could influence the carrying out of your patch cable.

Another area where habitancy get messed up is that they handle cat 5 cable improperly. A common mistake is to staple this cable to the lowest of a wall or on a baseboard. This can crimp or crush the wires inside your cable. Instead, use only manufacturer-recommended supplies to hold your cat 5 cable in place. As well, make sure that you do not lay your cable near any existing wiring -- it may interfere with the signal transmission through the cable.

A final mistake that many habitancy make when constructing their own cat 5 patch cables is not testing the cable once the connectors have been attached. It is all the time a good practice to use your testing device to verify the capability and integrity of your connections before you began using your patch cord. If your testing device indicates there is a problem, cut off one end of the cable and attach a new connector -- then test it again. If there is still a question with your cat 5 patch cable, flip it over and cut off the other end and attach a new connector there as well. Now test it -- once you get a green Light from your testing equipment, then you can begin putting that patch cable to good use.

making Your Own Cat 5 Patch Cable - Some tasteless Pitfalls and Mistakes


Digital Photography Secretsby David Peterson Click Here!

My Links : USB Battery Charger & Accessories Deals Nfl Jersey Naacp Image Awards 2011