
The steps below are general Ethernet cat5 cable building guidelines. They will work for production any type of network cables. For our example we will be production a type 5e patch cable. A key point to remember in production Ethernet patch cords is that the “twists” in the private pairs should remain entwined as long as potential until they reach the Rj-45 plug termination. The twisting of the pairs in the network cable is what helps to ensure good connectivity and keeps cross-talk interference to a minimum.

Step 1 - Stripping
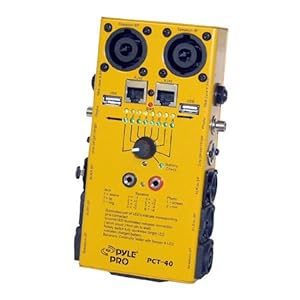
Cable Tester
Start by pulling out about 12 feet of bulk network cable to production the process a diminutive easier. Considered reMove the outer jacket of the cable exposing about 1 1/4" of the twisted pairs. Be careful when stripping the jacket as to not nick or cut the internal wiring. After removing the outer case you will notice 8 wires twisted in pairs and a rip cord (white thread).
Step 2 - Inspecting
Inspect the newly revealed wires for any cuts or scrapes that expose the copper wire inside. If you have breached the protective sheath of any wire you will need to cut the entire segment of wires off and start over at step one. Exposed copper wire will lead to cross-talk, poor carrying out or no connectivity at all. It is foremost that the jacket for all network cables remains intact.
Step 3 - Preparation
To put in order the wires and to make them easier to work with, you can untwist the pairs so they will lay flat in the middle of your fingers. The white piece of thread can be cut off even with the jacket and disposed.
Step 4 - Layout
Now based on the wiring specifications you are following you will need dispose the wires in a inescapable pattern. There are two methods set by the Tia, 568A and 568B. 568B is the most tasteless network cables, widely used for computer networks and digital phone systems. So for our demonstration we will use that. Beginning from the left-top side of the Rj-45 plug, the wiring should be in the order shown at the right.
Step 5 - Jack Preparation
Again, press all the wires flat in the middle of your thumb and forefinger as shown in step three. Verify the colors have remained in the definite order. Using a pair of scissors, cut the top of the wires even with one someone else so that they are 1/2" long from the base of the jacket. Ensure that the cut leaves the wires even and clean; failure to do so may cause the wire not to make feel inside the jack.
Step 6 - Wire Insertion
Ensuring that the wires remain flat and in order, push them into the Rj-45 plug with the flat exterior of the plug on top. The white / orange wire should be on the left seeing down at the jack. You can tell if all the wires made it into the jack and allege their positions by seeing head-on at the plug. You should be able to see a wire placed in each hole, as seen at the lowest right. You may have to use a diminutive exertion to push the pairs firmly into the plug. The cabling jacket should also enter the rear of the jack about 3/16" to help gather the cable once the plug is crimped.
Step 7 - Crimping
Now place the wired plug into the crimping tool. Give the deal with a firm squeeze, you should hear a ratcheting Noise as you continue. Once you have completed the crimp, the deal with will reset to the open position.
Step 8 - Testing
Once your new cable is completed, it is not a bad idea to test the cable to ensure that it will function in the field. It is vital that all eight wires have connectivity and are in the definite order. Mis-wired network cables could lead to headaches down the road. In addition, with Power-over-ethernet production its way into the shop place, crossed wire pairs could lead to physical damage of computers or phone theory equipment; production it even more crucial that the pairs are in the definite order. A straightforward cable tester can fast verify that facts for you.
You can find these instructions with pictures at [http://www.cat-5-cable.com/building-cat-5-cables.html]
construction a Cat 5 CableTags : USB Battery Charger & Accessories Deals St. Peters Basilica over toilet etagere
No comments:
Post a Comment